St Ives – In OO gauge
Webmaster
18th October 2020
3 minutes

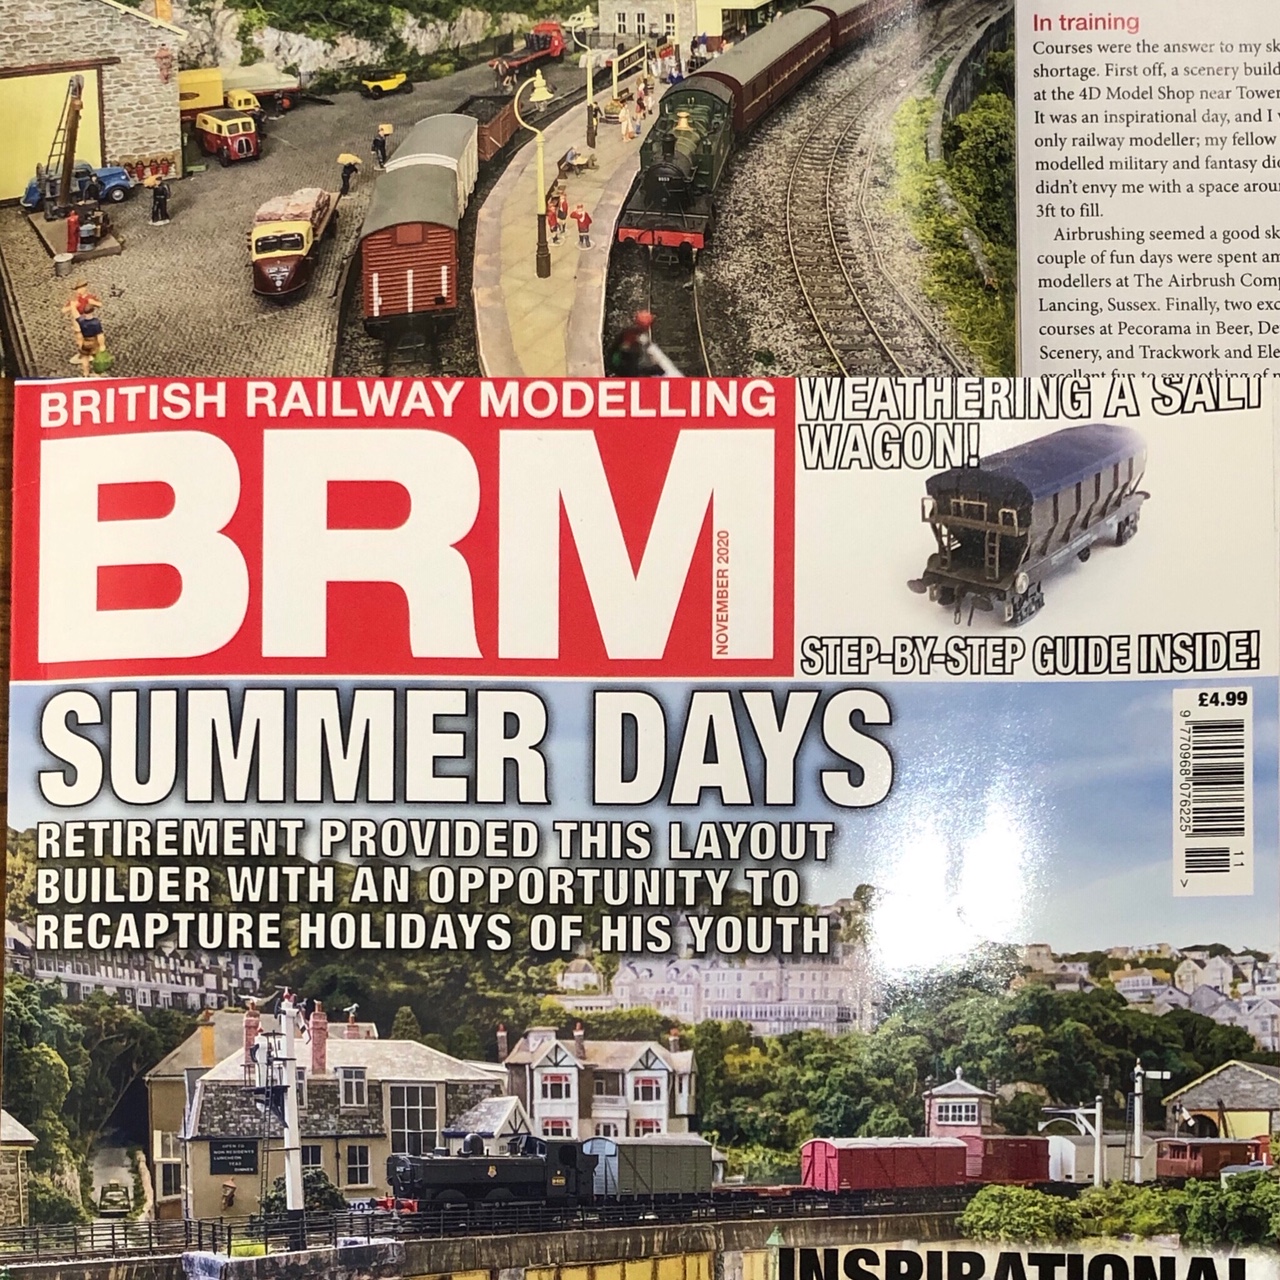
MRC member Paul Frabricius’s layout “St Ives” features in the November 2020 British Railway Modelling magazine – here’s a bit more about the inspiration, and a link to a video of it
OO Gauge. Approx 10ft x 3ft. Fiddle Yard 8ft x 1.5ft BR Mid 1950-60s
As a child I spent summer holidays on the beach at St Ives while at home I had a Trix Twin layout on a board in my bedroom. In my twenties I build a layout; it was really a bloated version of my Trix Twin one but with vastly increased budget and better track. Life intervened as the space was needed and so for the next thirty years the rollingstock was packed away until with retirement approaching a model railway seemed a good long-term creative project.
Where to Start?
Beyond Airfix kits I had never built a serious model. I invested in Anyrail and started designing a fantasy layout incorporating every kit I fancied and to be honest a fantasy space at home. As reality took over I committed to creating St Ives in our back room and to make the railway fit into the landscape.
Doing the Research
The Model Railway Club’s library proved a rich source of information and with AnyRail I was able not only to draw up the track plan but also to see how the landscape, railway and buildings would fit into the space.
Building It
I got my AnyRail plan printed out on A1 paper in black and white on a scale of 1:1. The baseboard is U shaped and follows the walls down one side of the room, into a bay window and then turns down the other wall into a fiddle yard. The whole thing is screwed to the wall.
The Backscene
The backscene uses drone photos from a drone and joined in Photoshop where I spent a long time removing modern buildings, busses and roof extensions often by adding trees to cover them.
The scenery
The scenery construction is conventional, Polystyrene covered with Plaster Cloth. I had a great need for trees and Woodland Scenics Forest Canopy.
The beach and the sea presented a challenge and again the drone photos provided a solution. In Photoshop I cropped a photo of the shore, duplicated another copy and flipped it to make them join and made then both fit on an A3 sheet. I then printed this out on my home printer on gloss photographic paper and stuck them to the baseboard. The waves are made by squeezing on builder’s clear Mastic and teasing it into wave shapes with a coffee stirrer guided by the waves in the photo underneath and then painting with Woodland Scenics White Water Highlight. The mastic hides the joins in the photos; but be warned, it dries quickly.
The Railway
The layout is conventional DCC. Peco Bullhead rail, DCC Concepts foam underlay to keep the noise down, power droppers everywhere, airbrushed N Gauge ballast, DCC Concepts Cobalt IP point motors, Dapol signals all controlled via Big Bear on a laptop and a NCE Power Cab controller. Doesn’t sound much but it took a while and the result is reliability.
Operation
In reality the branch was operated by small Prairie tanks but I have a range of locos both steam and diesel to run as and when I fancy. They all have ESU Lok Sound 5 Decoders which I had fitted by Mark Johns of Mark’s Trains. I felt that sound would be important and would add to the realism. Fitting Lok decoders means that I can easily adjust the sounds and characteristics of locos on a PC via a LokProgammer rather than on a controller that got its displays from a 1980s pager.
Want to see it?
Well, it’s a permanent installation so can’t go to exhibitions, but here’s a video I made
https://vimeo.com/441045017
Thursday Track Nights
We are open on Thursday evenings from 7pm to 9pm at our Keen House clubrooms. Visitors are welcome, please come along and introduce yourself.
Address:
Keen House, 4 Calshot Street, London, N1 9DA
Become a member


